
July 14, 2020

Upcycle your empty wine bottle into a beautiful tiki torch that will be sure to give your outdoor space a “glow-up.” You’ll be able to sip your favorite Show Me State wine on your patio, while their sweet scent will keep any bugs at bay. These tiki torches make great gifts and are a beautiful addition to any outdoor entertaining space.
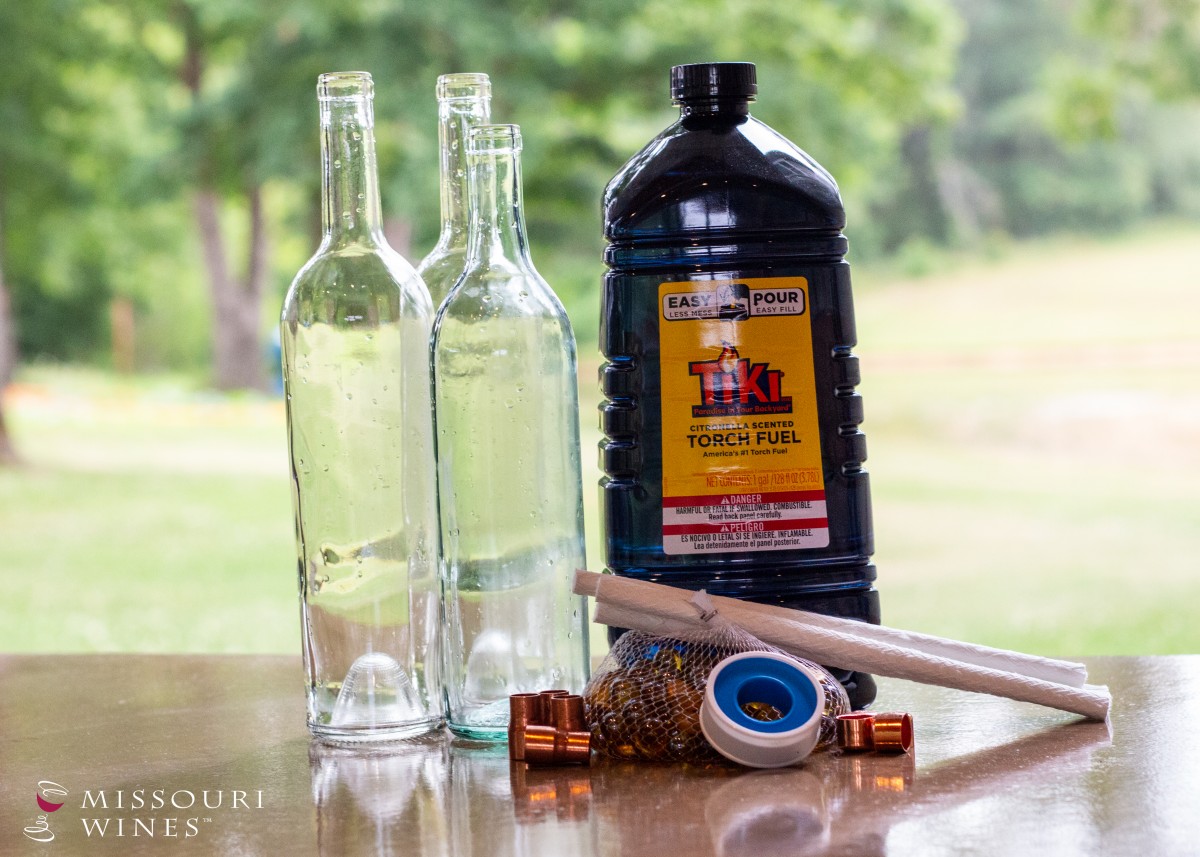
What You Will Need:
Wine bottles with the labels removed
Tiki torch wicks
Plumbing tape
1/2"-3/8" Copper reducing coupler
1/2" Copper cap
Citronella lamp or Tiki torch oil
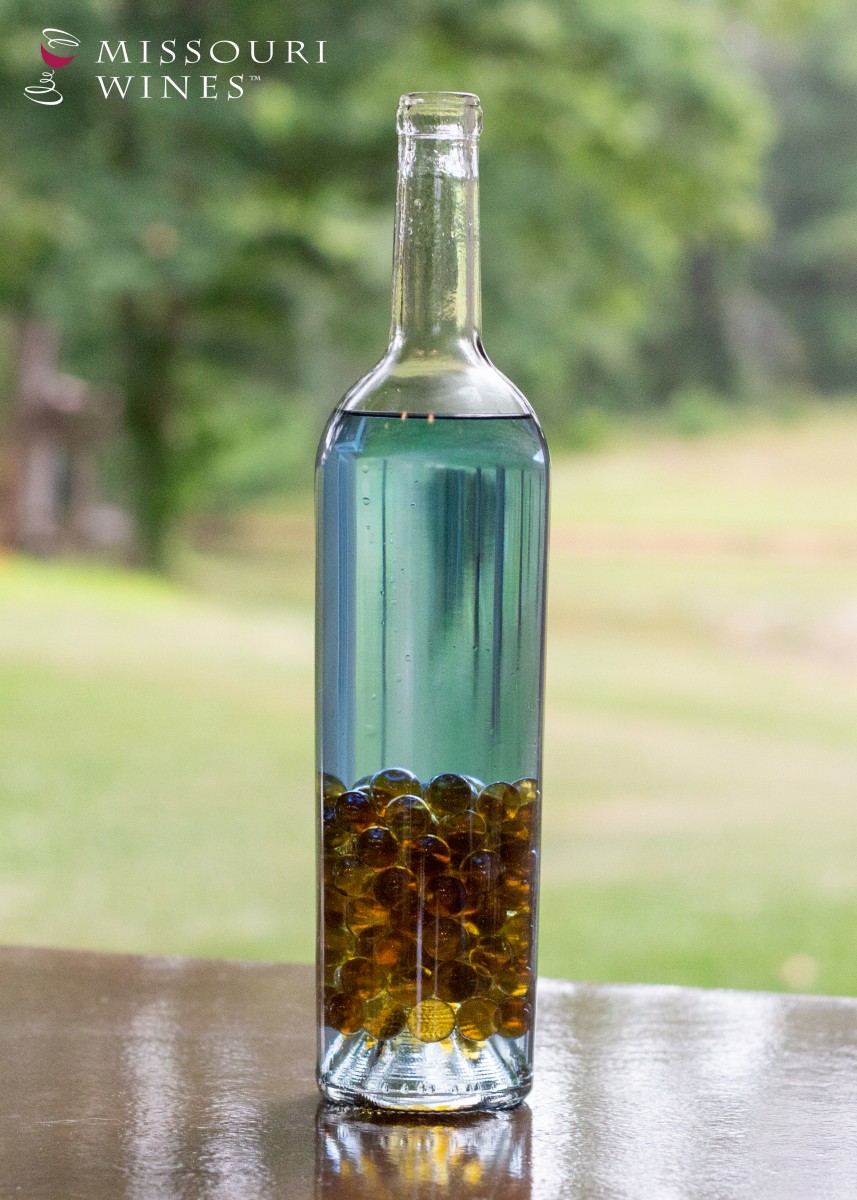
Glass vase beads, marbles, aquarium gravel or pebbles less than 3/8" in diameter
Step 1: Rinse your empty wine bottles inside and out. Carefully peel the labels. If the labels or adhesive is hard to remove, soak the bottles in a warm bath of hot water, white vinegar and dish soap until you can gently scrub away any remaining labels or glue.
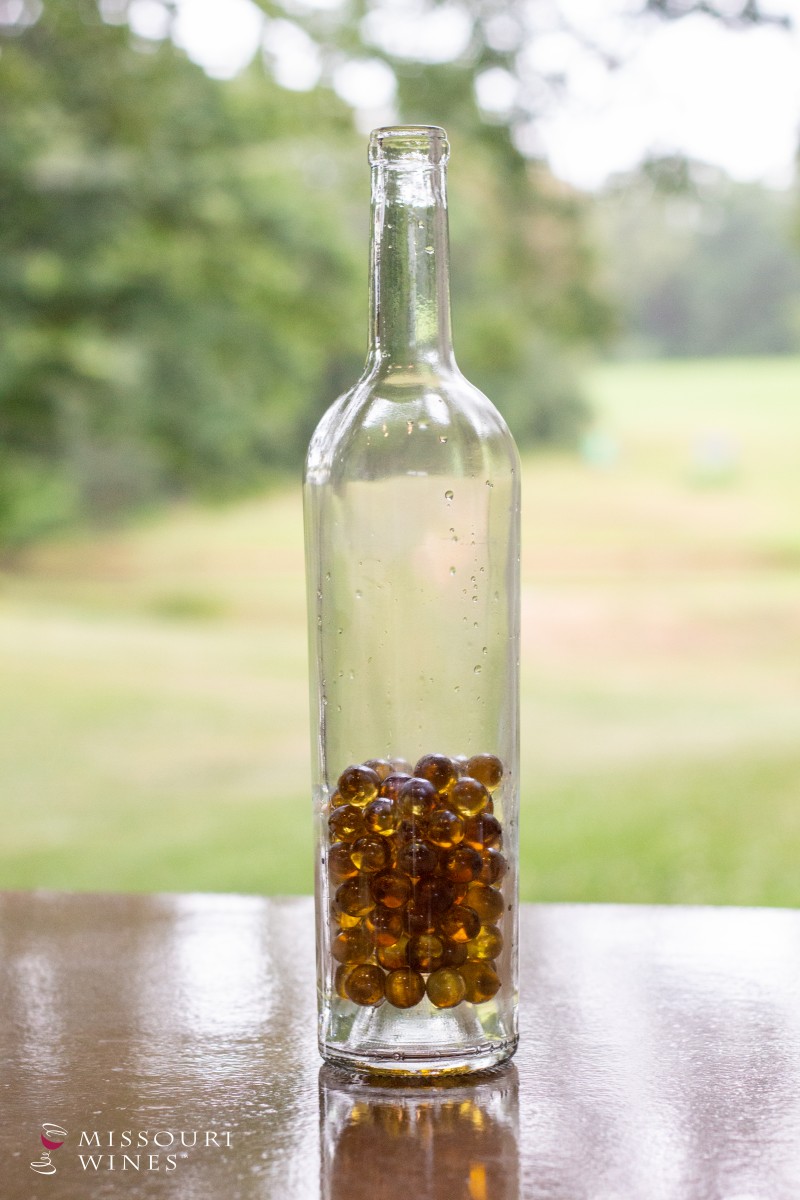
Step 2: Carefully pour your glass beads, marbles, aquarium gravel or pebbles into the bottom of the bottle until it is a third or a quarter of the way full. You can choose any item to fill your bottle with as long as the diameter is less than 3/8". Have fun selecting your stones, beads or marbles – picking ones that will provide a pop of color to your patio or match your outdoor furniture or decorations. A funnel will make it quicker and easier to fill the bottles.
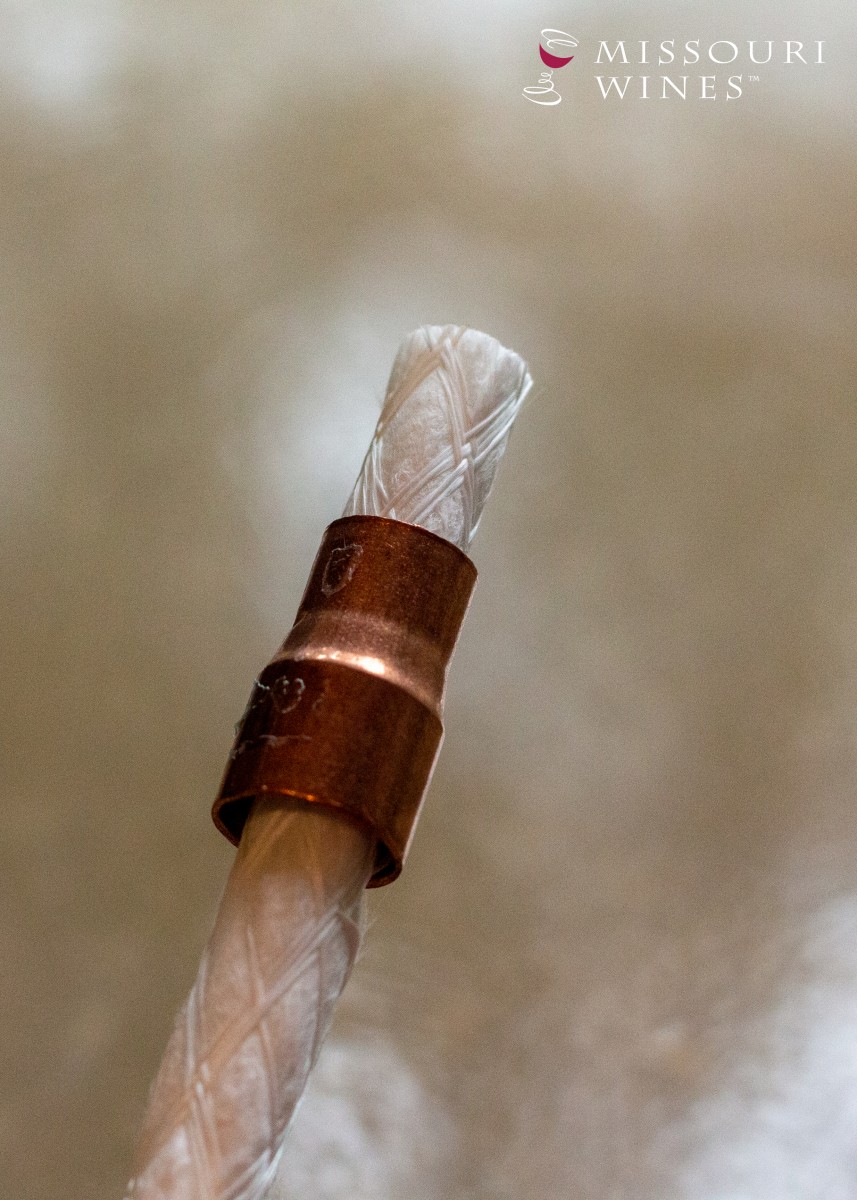
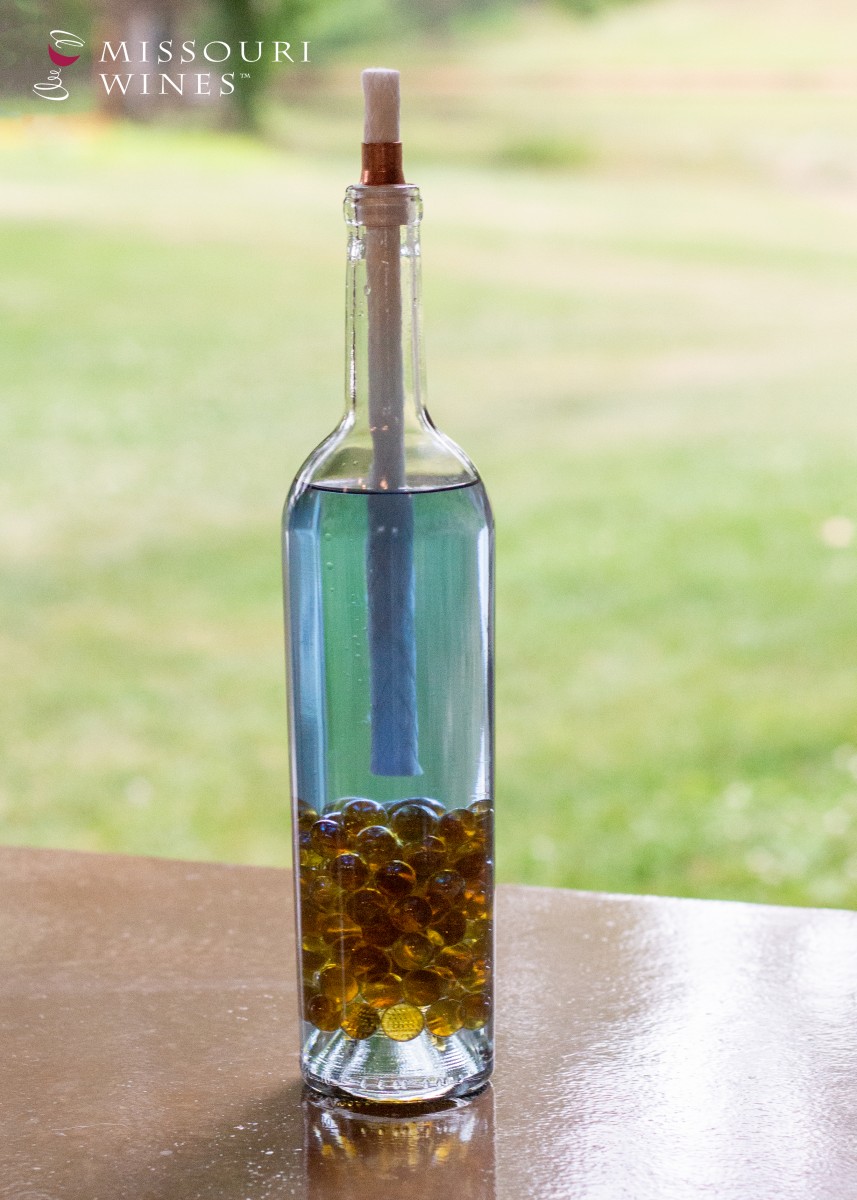
Step 3: Insert your wick into the copper coupler with about ½" sticking out past the coupler's narrower end.
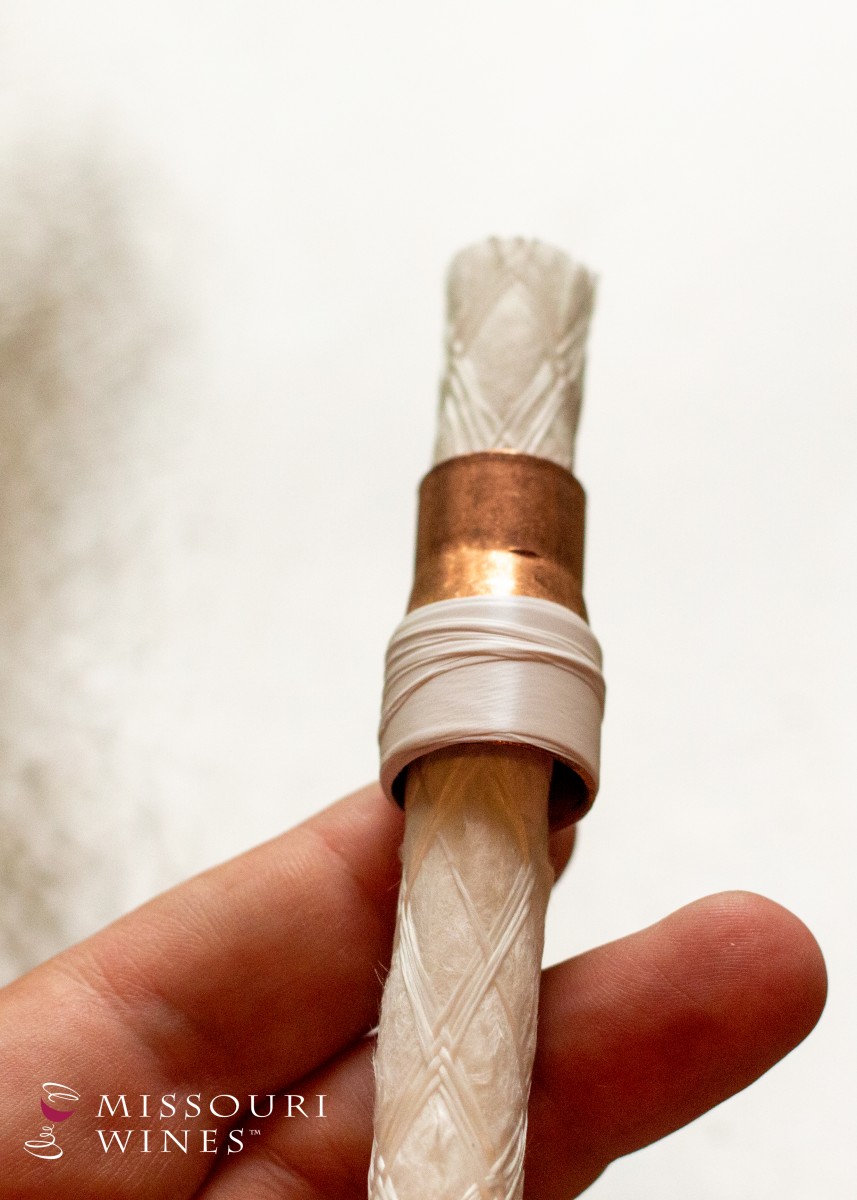
Step 4: Wrap plumber's tape around the wider end of the copper coupling. This will help to seal the bottle when you insert your wick and coupling. Each bottle will vary slightly in diameter, but we found between 5-10 wraps with the tape made for a snug fit.
Step 5: Fill the bottle to the base of the neck with tiki torch fuel. Citronella oil is an excellent choice for summer nights as its sweet smell helps keep the insects at bay. This is another instance where a funnel can help make this step quicker and less messy.
Step 6: Insert your prepared wick and coupling into the filled bottle with the long side of the wick and the broader end of the coupling fitting into the bottle. Push the coupling firmly into the mouth of the bottle until you've passed the plumber's tape and only the smaller end of the coupling and a 1/2" of wick are outside of the bottle. Please note if you believe you need to add more plumber's tape to better seal your torch or remove some tape so the coupling will fit into the bottle, remove the wick and coupling and make appropriate adjustments before re-inserting it in your bottle.
Step 7: Let your new torch sit for about 15 minutes to allow the neck wick to soak up the tiki torch oil.
Step 8: Light the wick and enjoy your new upcycled wine bottle tiki torch. Its beautiful, soft glow will illuminate your outdoor space and its sweet smell will keep bugs at bay while you sip your favorite Missouri wine on a warm summer night.
Step 9: When you're ready to head back indoors, blow out your torch and place the copper cap over the wick to prevent any water from soaking into the wick and making it harder to light next time you'd like to give your patio a "glow up."